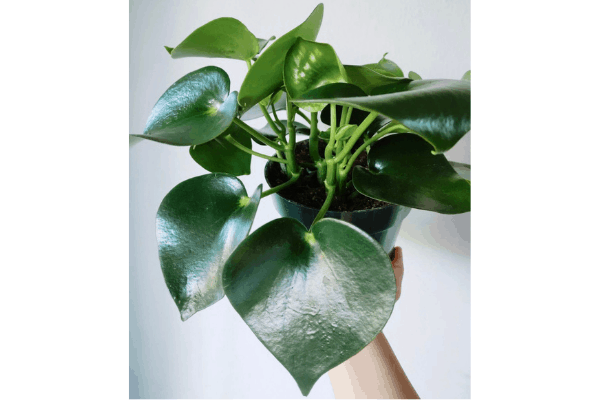
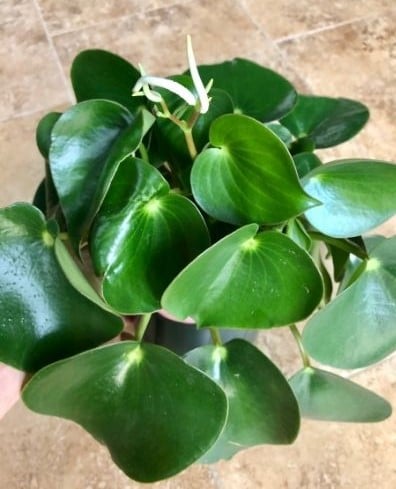
Peperomia Polybotrya, also called Raindrop Peperomia or Owl Eye Peperomia, has unique heart or raindrop shaped leaves and a vibrant green color.
The leaves have a smooth, fleshy, and waxy texture that are good for storing extra water to better survive periods of drought.
This makes Peperomia Polybotrya care fairly easy once you understand a few fundamental care tips to keep your plant healthy and looking its best.
This article may contain affiliate links to products I know and love. You can read my full disclosure at the bottom of the page.
PS: Can’t find a Peperomia Polybotrya plant at your local nursey? Don’t worry, you can buy your peperomia here online!
How to care for Peperomia Polybotrya (Raindrop Peperomia) houseplants
For Peperomia Polybotrya care or Raindrop Peperomia care, the 3 most important requirements are the following:
- Provide medium to bright indirect light. Light is like food to plants, so this is very important. You can provide this type of light by placing your Peperomia Polybotrya in front of an east- or west-facing window. A few hours of direct sunlight won’t harm your plant (and can actually be beneficial), but try to avoid prolonged/all-day direct sunlight.
- Water your Raindrop Peperomia thoroughly once the soil has completely dried from the previous watering. You can stick your finger a few inches into the soil to feel for moisture, or you can use a moisture meter to check if the soil registers as wet or dry. Once dry, water your Peperomia so the soil is saturated from top to bottom. Let any excess water drain out of the drainage holes in your pot.
- Plant your Peperomia Polybotrya in a well-draining pot and soil mix. I recommend making a chunky soil mix of 2 parts coco coir, 1 part perlite or pumice, 1 part fir bark, 1 part horticultural charcoal, and 1 part worm castings.
This chucky, well-draining potting mix will help improve the drainage and airflow in the soil and around the roots, which help prevent root rot. Also, use a pot that has multiple drainage holes, as this again helps with drainage and airflow around the roots.
If you follow the above 3 care fundamentals, your plant will thrive and may even bloom in the spring.
Now, let’s walk through each of these factors in more detail and discuss other less important but still helpful care tips and advice for your Peperomia Polybotrya (Raindrop Peperomia).
I’ll also discuss Peperomia Polybotrya propagation (and show you my results!) so you can make new plants.
IN THIS POST
What kind of light does Peperomia Polybotrya need?
Peperomia Polybotrya does best in medium to bright, indirect light.
Placing your Peperomia in front of an east- or west-facing window indoors will work well.
In these locations, your Raindrop Peperomia will receive a couple hours of direct sunlight and then medium to bright indirect light the rest of the day. This is the ideal amount of light for your peperomia.
Don’t worry about a few hours of direct sunlight—your peperomia will actually appreciate it. Just avoid all-day direct sunlight.
I keep my Peperomia Polybotrya indoors in front of my west-facing sliding glass door and it has rewarded me with it’s dainty, sweet-smelling blooms in the spring. This plant doesn’t bloom traditional flowers but rather a bloom that looks like a mouse tail.
Raindrop Peperomia can also be grown outdoors, and the care is pretty similar in both indoor and outdoor environments.
A bright but shady location outdoors works well (receiving 3 hours or less of direct sunlight).
The main things to look out for if you grow your Peperomia Polybotrya outdoors is that it’s not getting all-day direct sunlight and that it is brought inside if the temperature drops too low (below 50°F or 10°C).
How do you water Peperomia Polybotrya?
Water your Peperomia Polybotrya once the soil is completely dry. These plants can store quite a bit of water in their leaves, so letting the soil dry out won’t hurt your plant and will help ensure you don’t overwater it.
Just make sure you don’t let the soil remain dried out for too long. If the soil is bone dry and you notice the plant starting to wilt or droop, it needs water.
Try not to let your Raindrop Peperomia reach this stage. But if it does, don’t worry. Plants are generally more forgiving of underwatering than they are of overwatering.
Give the soil a good soak and allow the excess water to drain out. Then, go about your normal routine of watering as soon as the soil dries out again.
On the other hand, if you overwater your Peperomia Polybotrya, you may notice stem rotting, yellowing leaves, and/or wilting. The soil will also be very wet and heavy when you see these symptoms.
If you’ve overwatered your Raindrop Peperomia, stop watering until the soil has completely dried out. Remove any dead leaves and make sure your plant is getting plenty of bright, indirect light for most of the day. (Without proper light, even if you are watering correctly, your plant will be more susceptible to disease and rot due to a weak root system.)
Remember to only water your Peperomia again once the soil is completely dry (from top to bottom). It may take longer for the soil to dry out during the winter, which is normal. Simply adjust your watering accordingly.
What kind of soil does Peperomia Polybotrya need?
A well-draining soil is important for Peperomia Polybotrya or Raindrop Peperomia.
There’s a couple different ways you can make this soil mix:
Option 1: Mix 2 parts indoor potting mix (moisture retention and nutrients) with 1 part perlite or pumice (drainage/airflow).
Option 2: Mix 2 parts coco coir (moisture retention), 1 part perlite or pumice, 1 part fir bark, 1 part horticultural charcoal (drainage/airflow), and 1 part worm castings (nutrients).
I usually go with option 2 (shown below).


Make sure the pot you choose isn’t too much larger than the root ball of your Peperomia to avoid overwatering and root rot. It should also have plenty of drainage holes.
If you’re repotting your Raindrop Peperomia, a pot that’s 2 inches larger in diameter than the previous pot will work well (assuming the roots have filled the previous pot).
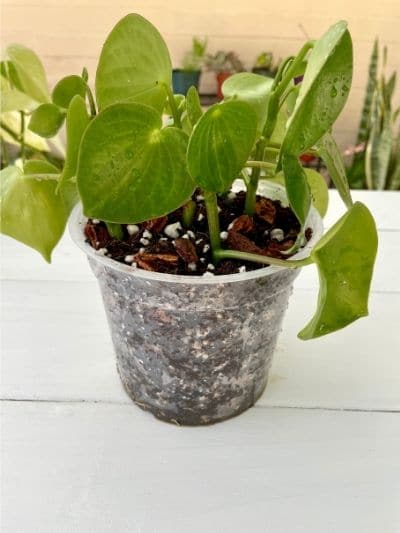
I like these clear plastic 6 inch pots because it’s easy to see the conditions of the soil and roots.
And they fit perfectly into this 6.1 inch decorative cover pot!
What temperatures can Peperomia Polybotrya tolerate?
Peperomia Polybotrya does best in a temperature range of 65 to 80°F or 18 to 27°C. It can tolerate warmer temperatures as long as it’s not in all-day direct sunlight.
If you’re growing your Raindrop Peperomia outdoors, make sure it’s in a shady location and it should be ok if the temperature gets a bit warmer. Just keep an eye on the soil moisture because it will need more frequent watering in warmer conditions.
However, I would recommend bringing your plant inside if the temperature drops below 50°F or 10°C to avoid damage.
How do you fertilize Peperomia Polybotrya?
Peperomia plants don’t have strict fertilization needs. You can fertilize once a month in the summer with dyna-gro 9-3-6 liquid fertilizer or with an organic fertilizer.
But keep in mind, if you recently purchased the plant or recently repotted it, you shouldn’t need to fertilize it for 9-12 months. And you don’t need to fertilize if the plant slows or stops growing in the winter.
It’s better to underfertilize than overfertilize Peperomia Polybotrya to avoid damage.
How do you propagate Peperomia Polybotrya?
Peperomia Polybotrya (and Peperomia plants in general) can be propagated by either stem cuttings or leaf cuttings.
Stem cuttings will root and produce new growth the fastest. However, if you’re patient or like to experiment, new plants will grow from leaf cuttings as well!
Propagation is best done in the spring or summer, with better chances of success.
How to propagate Peperomia from stem cuttings
- Cut the stem below a node and remove the bottom leaves if necessary to have enough stem to plant (shown below). After removing the bottom leaves, you’ll still want to have a few leaves at the top of the cutting. So make sure to plan for that before you cut.

- Choose a small pot filled with a well-draining soil mix to plant your cutting(s) in (shown below). I find it’s easiest to wet the soil before you plant the cutting rather than after.

- Keep your new plant in bright, indirect light (no direct light for a cutting).
- Keep the soil somewhat moist. It’s a balance here because you don’t want your cutting to rot from being too wet or dry out from being too dry. If you notice the top couple inches of soil drying out, that’s usually a good time to water the planted cutting.
- After a few weeks, new roots should form and you may even see some new growth begin to form on your cutting.
- Over time, it should continue to put out new growth and develop a healthy root system. Once it outgrows the small pot you chose (maybe 6 months give or take), consider repotting it into the next size up container and you should have a well established plant!

How to propagate Peperomia from leaf cuttings
- Cut a healthy peperomia leaf in half horizontally (pictured below).
- Plant both leaf halves cut side down in a small pot or propagation tray filled with well draining soil mix (pre-moistened). The cut side should be planted a few centimeters into the soil (pictured below).
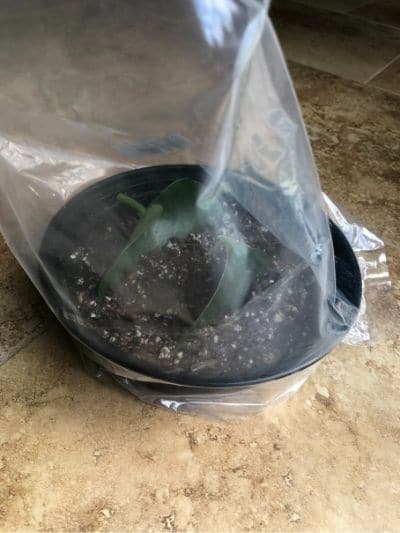
- Cover the top of the pot or tray with a clear plastic bag to keep the humidity high. But make sure the bag isn’t touching the plant (pictured below).
- Remove the bag for a few minutes each day to ensure the humidity isn’t too high and to provide fresh oxygen.
- Provide the cutting with bright, indirect light and keep the soil slightly moist.
- Roots will form from the cut part of the leaf after a few weeks.
- Eventually, a new baby plant (or even multiple plants) will begin to grow from the leaf cutting.


Peperomia Polybotrya Propagation Results
I wanted to show you how humidity can really make a difference when you’re trying to propagate Peperomia Polybotrya (or almost any plant really). The picture below shows how my leaf cutting propagations look after several months of growth. The tray on the left was covered with a plastic bag to create a humid environment. The tray on the right was left uncovered. (Also important to note is that I live in southern California and our air is typically dry. Perhaps if you live in a really humid environment, your results wouldn’t be so drastic.)

As you can see, the tray on the left that was covered looks much healthier with larger growth than the tray on the right. So humidity is definitely important for propagation and getting the best results.
Roots and baby Peperomia Polybotrya grew from the front and back of the cut end of the leaf and from the stem of one of the leaves (pictured below).
Next, I carefully removed the Peperomia Polybotrya baby propagations from the leaves and tried to keep as much of the roots attached to the babies as I could.
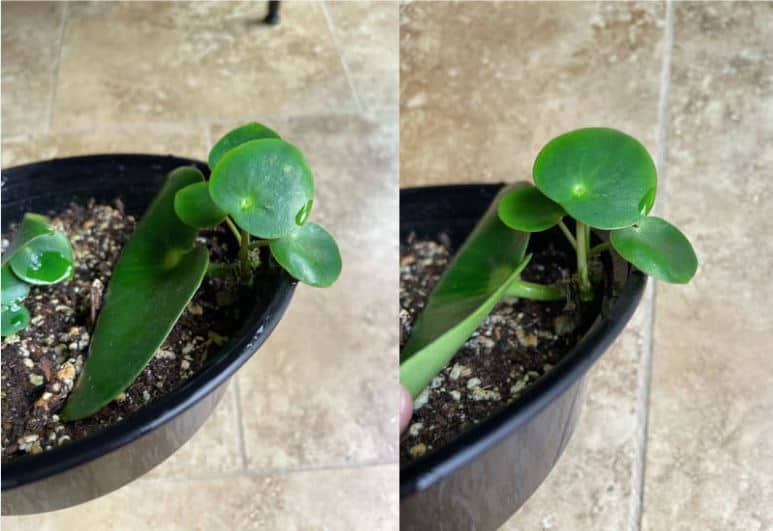
Then, I planted the babies in 4 inch nursery pots (pictured below) with the same soil mix I described above in the soil section.

The top picture above shows the babies I removed and planted. The bottom picture shows those same baby plants about 3 months later and how much they grew!
Once I planted the babies in their own pots, I didn’t cover them anymore. I just made sure they received bright indirect light. (I kept them indoors in front of my west-facing sliding glass door on a shelf.)
I also kept the soil a bit more moist for the babies than I normally do for my full-grown Polybotrya. Baby plants can’t handle stress like an established plant can.
Overall, I think you’ll find the propagation process to be fairly easy and rewarding! Happy propagating!
Are Peperomia plants toxic to cats or dogs?
Peperomia plants are pet safe! They are not poisonous or toxic to cats or dogs according to the ASPCA.